How to validate emails in Google Sheets
We are going to show you how to validate emails in Google Sheets using the following methods: Let us see each of these in detail:
1] Validate emails in Google Sheets using the ISEMAIL function
If you have a long list of emails, you can evaluate whether these emails are even real or not, using the ISEMAIL function. Suppose we have a list of emails in cell range A2:A5 in a given spreadsheet. To evaluate whether these emails are true or not, we are going to follow the steps mentioned below: Now let’s see how to use color coordination to highlight cells.
2] Validate emails in Google Sheets using Data Validation rule
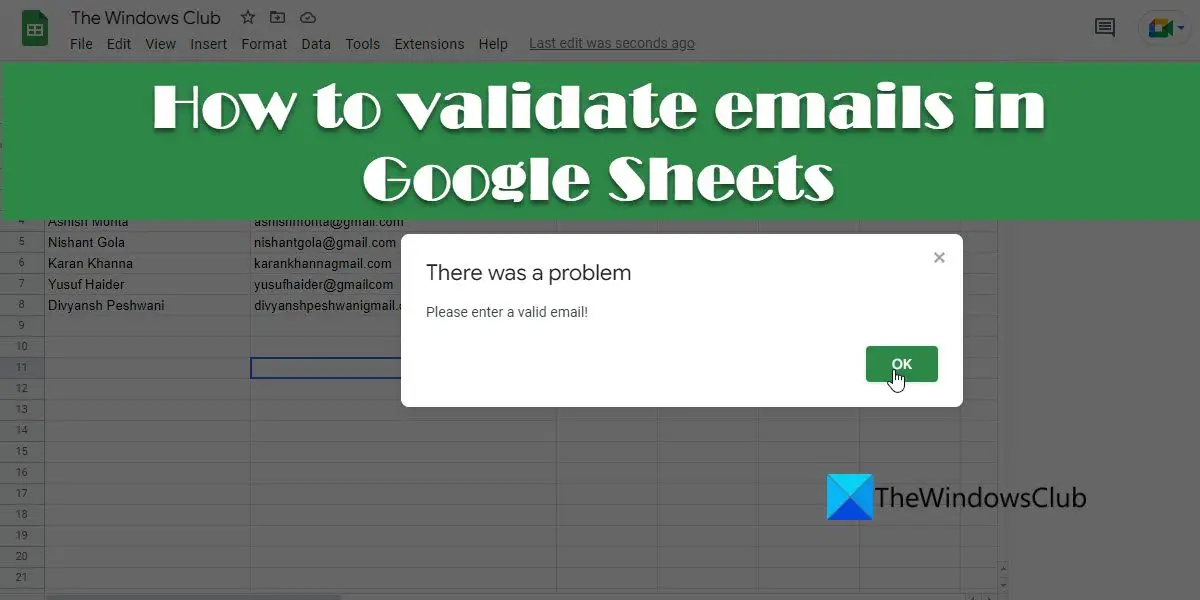
Data validation is a built-in mechanism in Microsoft Excel and Google Sheets that lets you enter only specific data within a cell by applying rules. The validation ensures that the data entered should comply with the rule. Let us see how to impose a data validation on a spreadsheet column that needs to have only emails. The data validation creates red triangles in the upper-right corner of the cells having incorrect inputs. As you move your mouse pointer over those triangles, you will see the error message. If you want to validate data while it is being entered and display a custom error message for an incorrect input, select On invalid data > Reject input. Then click on the checkbox next to Appearance and enter/ edit the error message you want to display to the reader. Also Read: How to Export or Import Data from Excel to Google Sheets.
3] Validate emails in Google Sheets using Conditional Formatting rule
Conditional formatting allows you to change the appearance of a cell based on a certain rule. So when you want to highlight cells that contain invalid email addresses, you can use custom formula under conditional formatting in Google Sheets. Here’s how this can be done using the above example. This winds up three different methods for validating emails in Google Sheets. I hope you find this useful.
How do you add validation in Google Sheets?
Google Sheets allows you to add data validation rules to verify the data or information that is being entered in a cell. To add validation, select the cell(s) and click on the Data menu on top of the spreadsheet. Then select the Data validation option. Now in the Data validation window, set validation criteria using the available options (Number Text, Date, etc.). Then specify whether to show a warning or reject input based on the set criteria. You can also display a custom error message for invalid input. Click on Save to add validation. That’s it!
How do I make an email link in Google Sheets?
To create a link on an email in Google Sheets, select the cell containing the email address and then click on the Insert menu. Then select the Link option. Alternatively, you can press the Ctrl + K key combination. Now in the text box area, type ‘mailto: