Add Expiration Date and Time for Outlook emails
In this tutorial, we will explain: how to set an expiration date for a message, how to add an expiration date to all the messages sent and how to format expiration date appearance. Expiration is to stop being valid and no longer usable.
How to set an Expiration date for a message in Outlook
Open Outlook.
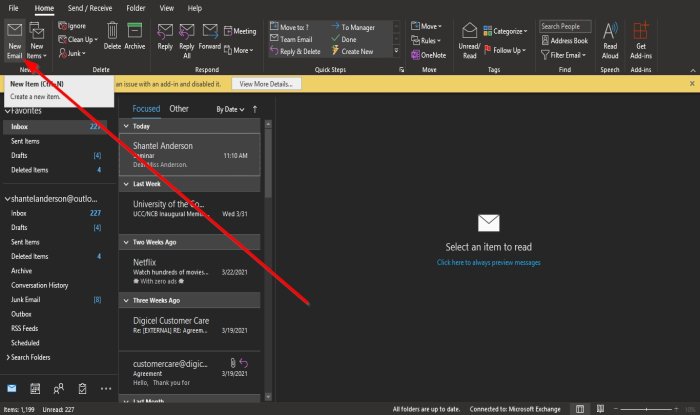
Click New Email on the Home tab in the New group.
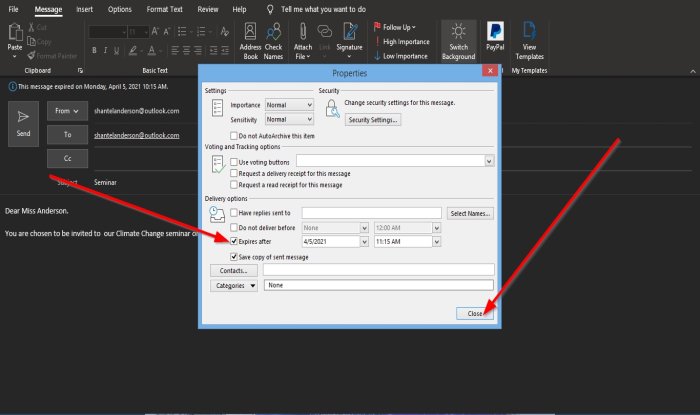
Click the Message Options, a small arrow at the bottom right in the tags group. A Properties dialog box will appear. Inside the dialog box, under Delivery Options, click the check box of Expire after, choose the date and time you would want the expiration date, and click Close. Now send the message.
How to add an expiration date to all the Outlook messages sent
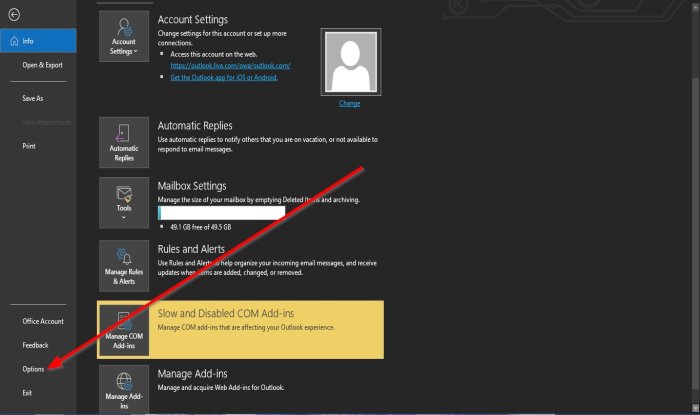
Click the File tab on the menu bar. On the Backstage View, select Options.
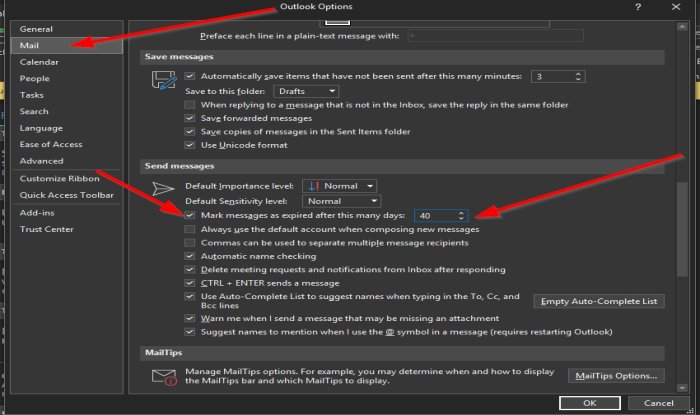
An Outlook Options dialog box will open. In the Outlook Options dialog box, click on the Mail in the left pane. On the Mail page, scroll down to the Send Messages section and click the check box for Mark messages as expired after this many days, and in the corresponding box, enter the number of days you want the messages to expire after. Then, click OK.
How to format expiration date appearance
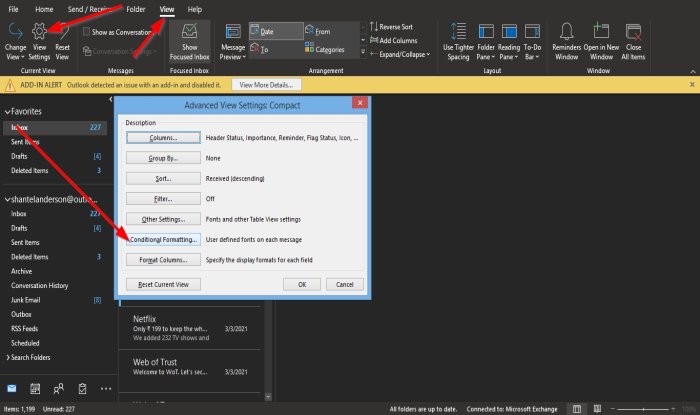
Click the View tab on the menu bar and select View Settings in the Current View group. An Advance Group Settings: Compact dialog box will pop up. In the Advance Group Settings: Compact dialog box, click the Conditional Formatting button.
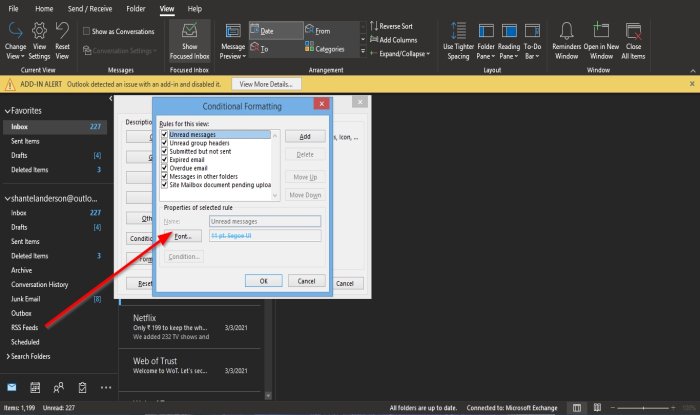
A Conditional Formatting dialog box will appear. Inside the Conditional Formatting dialog box, click the Font button.
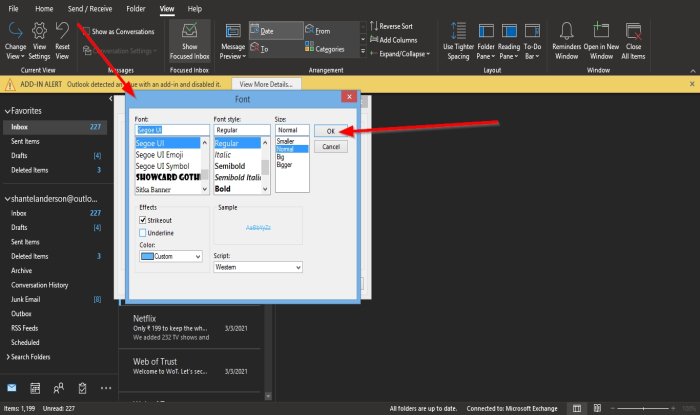
A Font dialog box will appear. Inside the Font dialog box, select the format you want the expired emails to be; you can choose if you want them to be underline or strikeout, color, font, font style, font size, and script. Choose your selection and click OK. Click OK for the other dialog boxes. Read: How to manage Replies and Forwards in Outlook. We hope this tutorial helps you understand how to set an expiration date and time for messages in Outlook; if you have questions about the tutorial, let us know in the comments.
