So let me tell you one simple tip to increase the effectiveness of your presentation with your images by removing their background.
How to remove background in PowerPoint
Many times while working you feel that you have got the best picture that can be used for your presentation, but you feel that you cannot use it because it has an inappropriate background or it does not go well with your presentation. I have seen people who use Adobe Photoshop which provides them with a Magnetic Lasso tool to freely select the portion of the image, and then they remove it. But let me tell you, you can do the same stuff with a lot more simplicity.
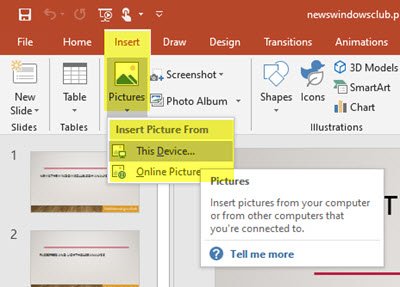
To remove background in PowerPoint, follow these steps: 1] Open your Microsoft PowerPoint 2] Go to Insert tab and select Picture
3] Now select any Picture whose background you want to remove. Just for the sake of simplicity, I am selecting the Penguins picture.
4] To increase the look and feel of the image I am changing the picture style and shadow style. Use them to increase the effect of images.
This is the image whose background I will be removing. 5] Select the Remove Background tab from the Picture Tools.
You will find a window asking you to Mark areas to keep, Mark areas to remove, etc.
6] Select Mark Areas to Keep. A Pen will come through which you can select the areas one by one.
7] Click on Keep Changes to get the image with the removed background.
That’s it!
The quality of the final image with the removed background will highly depend on the areas you selected and the precision and accuracy you had. This post will show you how to create a Silhouette in PowerPoint. TIP: Remove.bg lets you remove background from Images & Photos online free.


