First of all, you will have to download the Windows ISO from the official link at Microsoft. We will update this link once the final version is released.
How to create Windows 11/10 bootable USB Flash Drive
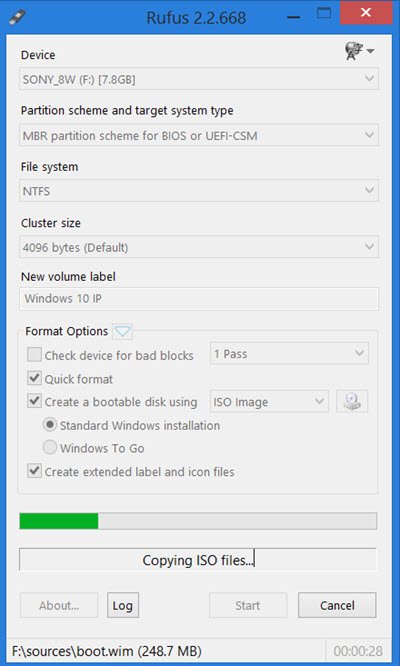
Once you have done this, you can use it to create a bootable USB or Flash Drive. To do this, you will have to take the help of some software like Windows USB/DVD Download Tool, Rufus, ABUSB, ESET SysRescue Live, WinToFlash, Windows USB Installer Maker, or Windows Installation Media Creation Tool. In this post, I am using Rufus as an example. It also offers a portable version, which I have used. After you have downloaded this freeware, insert your USB and then click on Rufus to open its main window. Do note that, you will require a 4 GB USB for the 32-bit version and an 8 GB for the 64-bit version of Windows 10.
You may give a New volume label and browse to the location of your downloaded Windows 10 ISO image. To browse to the location, under Format Options, you will see Create a bootable disk using option. Click on the small icon on the right side and browse to the folder, and select the ISO file. For the rest of the options, you may leave at their default values. When you use MBR partition scheme for BIOS or UEFI, under Partition scheme and target system type, the bootable USB will be suitable for devices using BIOS as well as UEFI. Once you have done this, simply click on Start and wait for the process to get over. Remember that when you click Start, all data preset on this USB will be deleted, so if you need to, you may back up your data first before using it.
Once the process is completed, you will have a bootable Windows 10 installation USB media in your hands, which you can use to install Windows 10. Related reads:
How to create a Windows bootable USB on LinuxHow to create a Windows Bootable USB on Mac.
If you feel the need, you may check if the USB is bootable.
