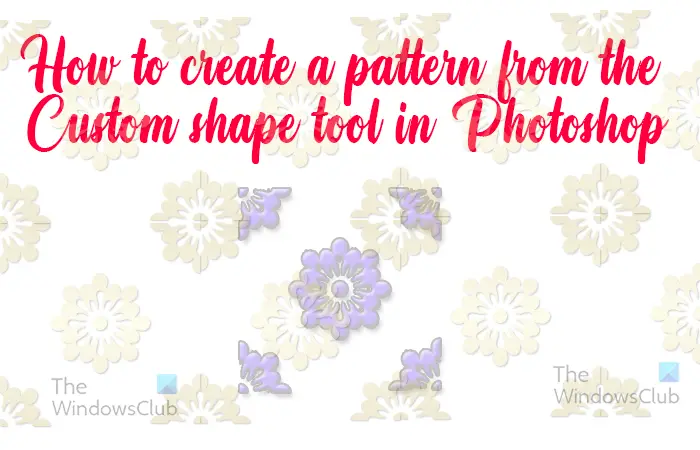
How to create Pattern using Custom Shape Tool in Photoshop
The Custom Shape Tool in Photoshop has some shapes that can be used to create patterns. these patterns can be used to make decorations for artwork, decorations for mockups of packages and clothing, background, and wallpaper for your devices. The custom shapes are small, but they can be put together to make larger shapes. This article will use the custom shape to make a pattern that you can use for multiple applications. To create the pattern, you get the shape from the custom shape tools, cut it up and design it the way you want, save it and then add it to the pallets in the Swatches panel. If you need to use the created pattern for large projects, you can use Photoshop to make it into a vector, or you can put the finished pattern in Illustrator and turn it into a vector. This method can be used for any of the custom shapes, however, some will be easier and some will take some imagination and skill. The steps to create a Pattern using Custom Shape Tool in Photoshop are:
1] Open and prepare the canvas in Photoshop
Open Photoshop and go to File then New then, the New document options window. Choose a document size of 200 px by 200 px and a resolution of 300 pixels/inch or a resolution that suits you. A larger resolution is best for prints, lower resolution is best for screen displays. Press Ok to confirm the new document options. When the new document is opened, you will need to divide the canvas into four quarters. You can do this by enabling the guides and using two guides (one horizontal and one vertical) to cut the canvas into four quarters. To enable the guides, go to the rulers, click on the ruler and hold the mouse button down and drag towards the canvas. Do this from the top and left ruler to create the horizontal and vertical guides. If the ruler is not showing go to the top menu bar then click View then Ruler or press Ctrl + R.
To line up the guides properly so that the canvas can be cut into equal parts, you can change the ruler’s measurement unit to pixels. To change the unit to pixels go to Edit then Preferences then Units & rulers. The Preferences window will appear, in the Ruler section choose Pixels. The measurement unit on the rulers will change. Put the guides at 100 0n the left and the top ruler. This positioning will depend on the size of your canvas. If you had used the measurement of 200 px by 200 px then the 100 px position of the guides will split the canvas into four quarters.
2] Place the pattern on a new layer
This step is where the shape for the pattern will be placed on the canvas. You should create a new layer for the shape. To create the new layer go to the bottom of the layers panel and click the Create a new layer icon. You may also create the new layer by going to the top menu bar and clicking on Layer then New layer or by pressing Shift + Ctrl + N.When the new layer is created, go to the left tools panel and click the Custom shape tool. The Custom shape tool is in the same group as the rectangle tool. With the Custom shape tool selected, go to the top menu bar and click on the drop-down arrow beside Shape. This will show the custom shapes. Scroll down until you see one of the custom shapes named Floral ornament 2. Click on it and go to the canvas. Click on the canvas and Create custom shape dialogue box will appear. Put in the measurements as 100 Width and 100 Height then press Ok to confirm.
The Floral ornament shape should appear on the canvas, align it with the guides so that the guides cut the shape into four equal pieces.
3] Remove lines
There are four lines on the shape that stick out from four of the corners, you can remove them. You can choose to use the Eraser tool to remove them.
When you attempt to use the eraser, you will get a rasterize image warning, click Yes to rasterize the image, and. You can also rasterize the image by right-clicking on it in the layers panel and then choosing Rasterize layer. You can then erase the parts that are not needed You will be left with the flowers and none of the four lines. This is the pattern without the lines.
4] Duplicate and rotate the shape
The next step is to duplicate the shape. You can duplicate the shape by clicking it and dragging it down to the Create a new layer icon at the bottom of the layers panel or by clicking Ctrl + J. The duplicate will be named Shape1 copy and it will be placed above the Shape layer.
The next step is to rotate shape 1 copy until it looks like the above image. to rotate it, click on Shape 1 copy in the layers panel. Press Ctrl + T to bring up the free transform box around the shape. Hold Shift and hover at the edge of the free transform box until you see a curved two-headed arrow. While holding Shift and the left mouse button, rotate the image. Keep rotating the image until it creates the above image.
5] Merge the shapes
When the image looks satisfactory, it is time to merge them into one layer. To merge the shapes, go to the layers panel. Click on one image, hold Ctrl then click on the other. With both layers selected, right-click on any one and choose Merge layers. Both shapes will be merged into one layer.
6] Copy and move pieces of the pattern
It is now time to add more to the shape so that it makes the pattern. With shape 1 copy selected, go to the left tool panel and click the Rectangular marquee tool. Use the Rectangular marquee tool to select the upper left quarter of the shape.
When it is selected, right-click and choose Layer via copy.
The layer copied will be named Layer 1 in the layers panel. Using the Move tool, click it on the canvas and move it to the lower left of the canvas. The canvas should start looking like the image above. Copy the second piece
Go to the layers panel and select Shape 1 copy which is the full shape, then go to the left tools panel and select the Rectangular marquee tool. Go to the lower quarter of the shape and use the Rectangular marquee tool to select it like you did the upper quarter. When it is selected, right-click on the area and choose Layer via copy. Use the Move tool and move the copied piece to the top left quarter of the canvas. The canvas will start looking like the image above.
Follow the same principle to complete the remaining quarters of the canvas. The canvas should start looking like the image above.
7] Merge all the pieces
Now that all the pieces are in place and the pattern is completed, it is now time to merge the pieces into one. Go to the layers panel and click the first image then hold Shift and click the last image. all five of the layers with the images should be selected. Right-click on any one of them and choose Merge layers.
8] Add background color
You can add background color to the artwork. To add color select the background layer then go to the bottom of the layers panel and click the Create new fill or adjustment layer. The menu will pop up, choose Solid color, then choose a color that will allow the shapes to show. The solid color chosen here is #676535.
9] Color the shape
You can color the image that makes up the pattern. To color the shape, select the shape and go to the bottom of the layers panel and click the Fx icon. The menu will appear, choose Blending options. You can experiment with the options there, remember that it is a background pattern so do not do too much to it or it may affect whatever will go on top of it.
A gradient is added and a shadow with size 1 spread 0 and distance 1.
10] Lower the opacity of the pattern
The pattern may be too bright so you may need to lower the opacity. To lower the opacity go to the layers panel and click on the pattern and lower the opacity to a level that is comfortable for you. This image’s opacity is 25%. You may also want to turn down the fill color over the background, this percentage will also depend on what is comfortable for you and what will fit the colors that you chose. The fill color is turned down to 40%. This will keep the fill color and the pattern from blending and looking like one. Dependent on the colors you chose, the outcome will be different. This pattern can be used for a lot of applications, it can even be used for the background of your website. It will be tiled to fill the page and the quarter images will ensure that the repeats will be seamless. You can save the image in the proper location and then direct the CSS code for the website to find it so that it can be used for the background of the website.
How to turn an image into a pattern in Photoshop?
Turning an image into a pattern in Photoshop is quite simple. You just open the image in Photoshop then go to Edit then Define pattern. You will get an option to give the pattern a name. give it a name or leave it with the default name that is there in the box. Read: How to Blur Image Background in Photoshop without affecting the image
How can I use the custom pattern that I saved in Photoshop?
To use the custom pattern that was saved in Photoshop, select the object that you want to use the pattern on. Go to the layers panel and right-click on the layer for that object. Choose Blending mode, when the Blending mode window appears, choose Pattern Overlay. A window will appear with thumbnails of the available patterns, look for the pattern you created and then select it.

