Change Default Sound Input Device in Windows 11/10
We can change Default Sound Input Device in Windows 11/10 in 2 quick and easy ways. We’ll explore this topic under the methods outlined below in this section: Let’s take a look at the description of the step-by-step process in relation to each of the methods.
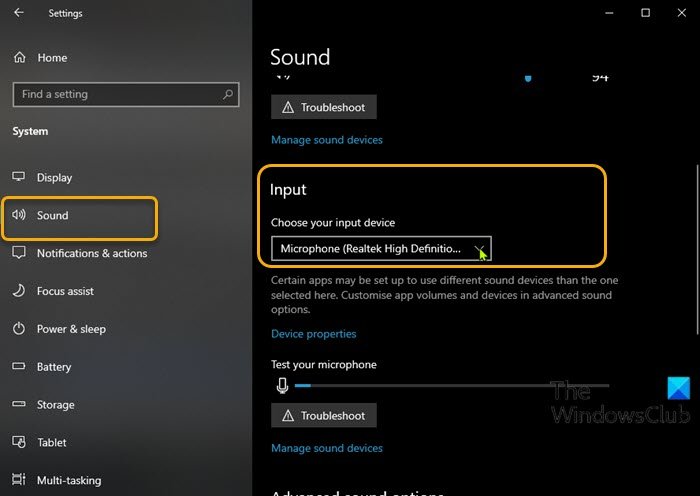
1] Settings app
To change Default Sound Input Device in Windows 10 via the Settings app, do the following:
Press the Windows key + I to open Settings.Click System.Click Sound on the left pane.On the right pane, under the Input section, for the Choose your input device option, click the drop-down and select the input device you want.
Note: You will not be able to choose if you do not have multiple input devices connected to your PC.
Exit Settings when done.
2] Control Panel
To change Default Sound Input Device in Windows 10 via Control Panel, do the following:
Press Windows key + R to invoke the Run dialog.In the Run dialog box, copy and paste the command below and hit Enter to open Sound settings.
Click the Recording tab.
To set the default recording device, do one of the actions below:
Right-click the recording device, and click on Set a Default Device.Select a recording device, and either:
Click on Set Default to set for both “Default Device” and “Default Communications Device”. Click on the drop menu arrow to the right of Set Default, and click on Default Device. Click on the drop menu arrow to the right of Set Default, and click on Default Communication Device. This will not be the “Default Device”.
Click OK when done.Exit Sound settings panel.
That’s it!