Add Disk Cleanup to context menu of hard drives
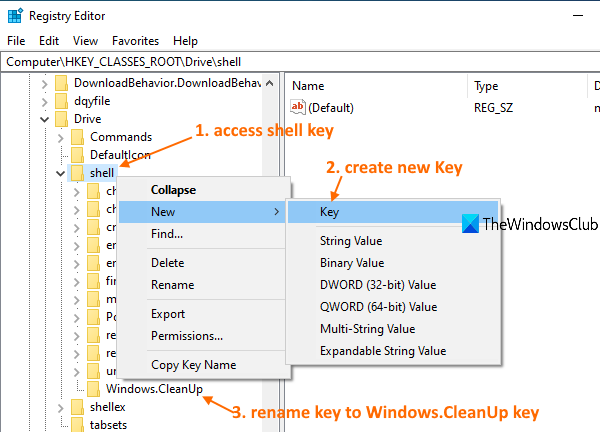
A Registry trick lets you add Disk Cleanup to the right-click context menu of all hard drives. Let’s check the steps: At first, open the Registry Editor window. For this, write regedit in the Search box and use the Enter key. In Registry Editor, access the shell name Registry key. The path is:
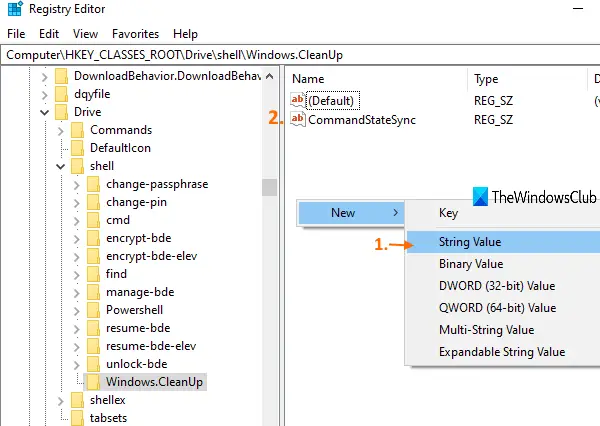
Access right-click menu of shell key, go to the New menu and use the Key option. This will create a new key. You need to rename that key with Windows.CleanUp, just like visible in the above screenshot. Now, on the right-hand part of Windows.CleanUp key, create a String Value using right-click menu, and set its name to CommandStateSync.
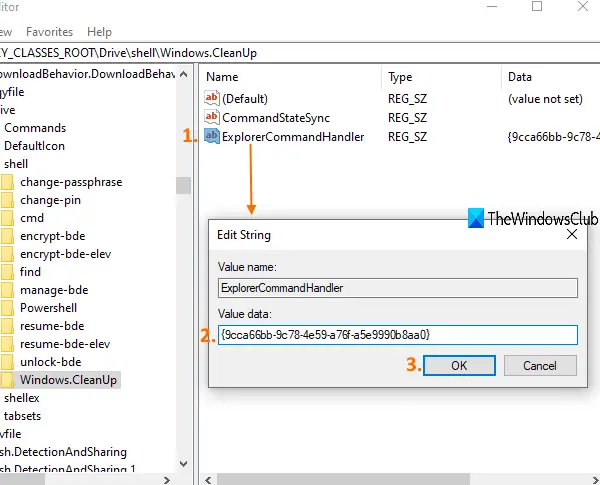
Create another String Value, and rename it with ExplorerCommandHandler. Double-click on ExplorerCommandHandler String Value and you will see a small box. There, add {9cca66bb-9c78-4e59-a76f-a5e9990b8aa0} in the Value data box. Press the OK button.
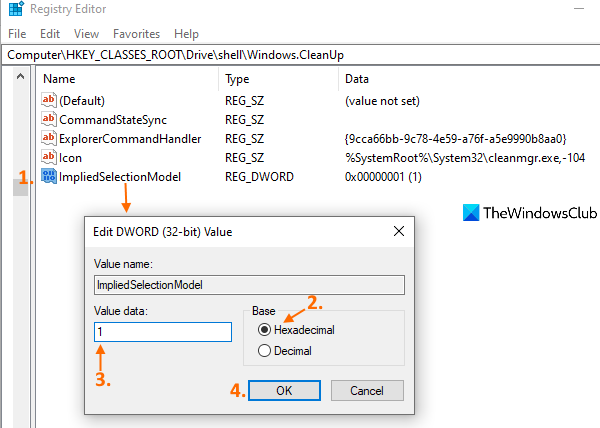
Again, create a new String Value with an Icon name. Double-click on that value and a box will visible. There, add %SystemRoot%\System32\cleanmgr.exe,-104 in its Value data box, and press the OK button. This will show the Disk Cleanup icon in the right-click menu of hard drives.
Now create a new DWORD value using right-click context menu and rename it to ImpliedSelectionModel.
Double-click on that DWORD value and a box will pop up. In that box, first, select the Hexadecimal option (as visible in the above screenshot) available under the Base section. After that, put 1 in the Value data field. Finally, press the OK button. That’s all! Open File Explorer and right-click on a hard drive. You will notice that the Cleanup option is visible. Clicking on that option will open the Disk Cleanup window for that particular drive. To remove the Disk Cleanup option from the right-click context menu of hard drives, just follow the above steps, and delete Windows.CleanUp Registry key created by you. Hope it helps. TIP: Did you know that the Command-line version of Disk Cleanup Utility offers more cleanup options?


![]()
